- Published on
Handling Missing Values in Datasets for Machine Learning/Data Science


A key and vital part of data cleaning for Machine Learning and Data Science is knowing how to handle missing values in datasets.
This blog post will show three methods of handling missing values in datasets. But before we get into that main topic, let's attempt to answer another important question:
Why is the data missing?
An important preliminary step in data cleaning is the use of your own intuition in trying to figure out why the missing values in a given dataset are indeed missing.
This involves the use of what is called 'Data Intuition'. This skill consists of thoroughly looking at the dataset, establishing why it is in its current state and how this current state will affect your analysis.
One important question to ask yourself while in the process of 'data intuiting' is:
Is this value missing because it wasn't recorded or because it doesn't exist?
Answering the above question will clarify whether to fill in a missing value via Imputation or drop the missing value from the dataset altogether.
In case you aren't sure, Imputation is the practice of estimating what the missing values should be by basing them on other values in the same column and row of a given dataset.
Ways for handling missing values:
- Drop the missing values: This option is not the most optimal in terms of dataset accuracy but if you're in a rush, it can be a viable method of handing missing data. The
dropna()method can be used for this purpose. When using it without passing in any arguments(oraxis=0), it will delete any rows containing at least one missing value, whereas including theaxis=1argument will delete all columns containing at least one missing value. Also, theinplace=Trueargument is required if you need to drop some data in the current dataset itself, otherwise a new dataset containing the remaining values will be returned. Here is an example of its usage:sample_dataset.dropna(axis=0, inplace=True)
🗈 Note:
- The total number of columns in a dataset can be revealed through the
shape[1]attribute. For example:
sample_dataset.shape[1]
# Outputs the number of columns in the dataset
- The total number of rows in a dataset can be revealed through the
len()method like so:
len(sf_permits)
# Outputs the number of rows in the dataset
- Fill in the missing values via Imputation: The second option is to try and fill in the missing values using the
fillna()method. For example, the following line of code:
sample_dataset.fillna(5)
Would replace all NaN values with the number 5.
There is also another way of filling in missing values: Copy the last or next valid observation of a value to fill the missing value. This feature can be accomplished using the method=bfill argument, to use the next valid observation as the basis for replacing a given NaN value, and the method=ffil argument, for using the last valid observation as the basis for replacing a given NaN value.

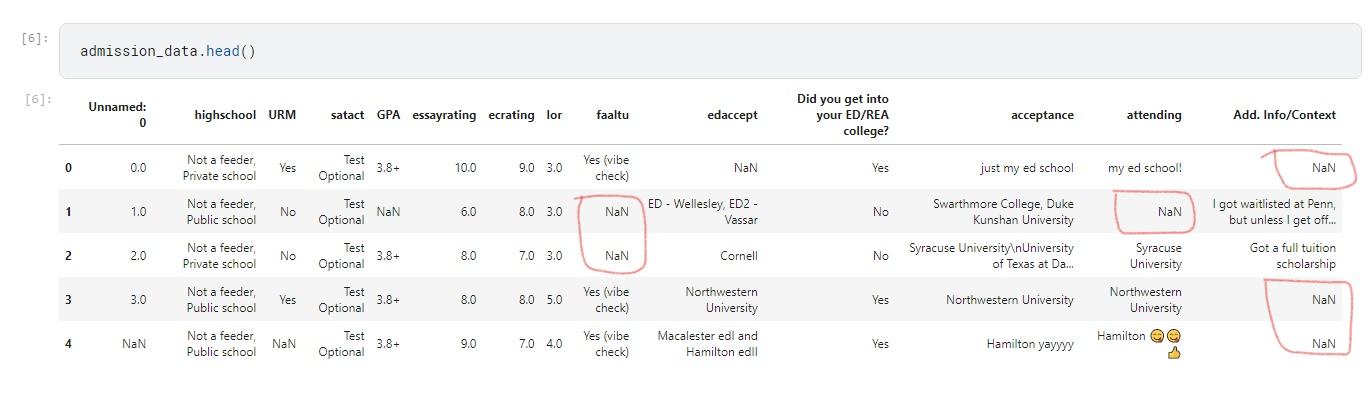
Figure 1: Showing the top 5 rows of a sample dataset, which contain some NaN values

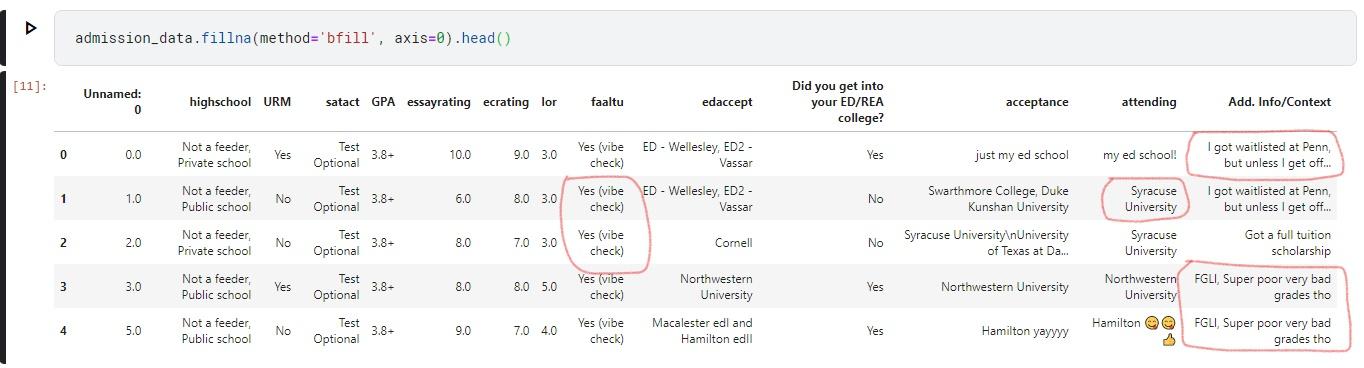
Figure 2: Showing the top 5 rows with method=bfill applied so that empty values are filled in with the next valid observation
- Fill in the missing values with an extension to Imputation: The third option is derived from Imputation with the extension of adding an extra column to denote whether or not a value in the current row was imputed. This is a way of denoting to the reader of the dataset that, if the extra column indicates a
Truevalue, that row's value was imputed from the adjacent values and that it should be used with some skepticism. This approach is helpful in improving the prediction power of the models in some cases and seem to have no effect in other cases.
Here is a visual example of this method:

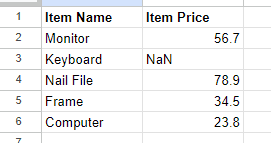
Figure 3: Before applying Imputation Extension method

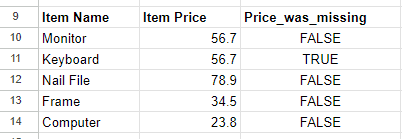
Figure 4: After applying Imputation Extension method
Conclusion
Well that's it for this post! Thanks for following along in this article and if you have any questions or concerns please feel free to post a comment in this post and I will get back to you when I find the time.
If you found this article helpful please share it and make sure to follow me on Twitter and GitHub, connect with me on LinkedIn and subscribe to my YouTube channel.